
Every now and then, someone shares something on the forum that makes us stop scrolling and say: “Wait… how did you make that?!” This was very much the case when Ksenia (aka Xute) posted her washi tape postcards some years ago!
Washi tape is one of those stationery supplies that many of us happily collect, but then sometimes struggle to actually use beyond borders, corners or little bits of decoration. Ksenia’s idea is a brilliant way to put those rolls to work: instead of drawing with pencils or paints, she uses torn pieces of tape almost like a paint brush, layering colours and textures until they become a picture. Just look at these!

The results are stunning, and Ksenia kindly gave us permission to share her process here. Maybe it will inspire you to try something similar with the tapes you already have at home!
The washi tapes from which the handmade postcards above were made are from the set on the left below — it has twenty Van Gogh-themed narrow washi. I like having sets of Van Gogh tapes like the one on the right too.
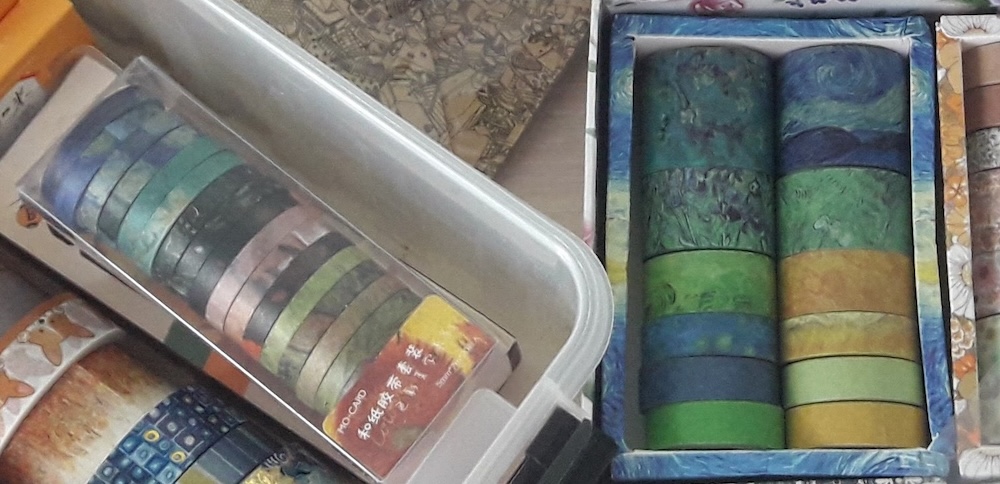
But the glue on these washi tapes is not that good: while for wider tapes I either use stick glue or stickers on top for the edges, for narrow ones it just doesn’t work in my regular decoration.
Even though it looks like it’s hard to do, it’s not at all! I just mark very general lines for the picture, and then fill it with colour of washi which fits somewhat, ripping them approximately with fingers. The Van Gogh colours do the rest of the work!
Of course with Van Gogh tapes nicest would be recreation of his own paintings which I did for the ones shown above. For next try I decided to use the motive of Wassily Kandinsky “Winter landscape” painting as a reference. In his early works he was inspired by French impressionists.
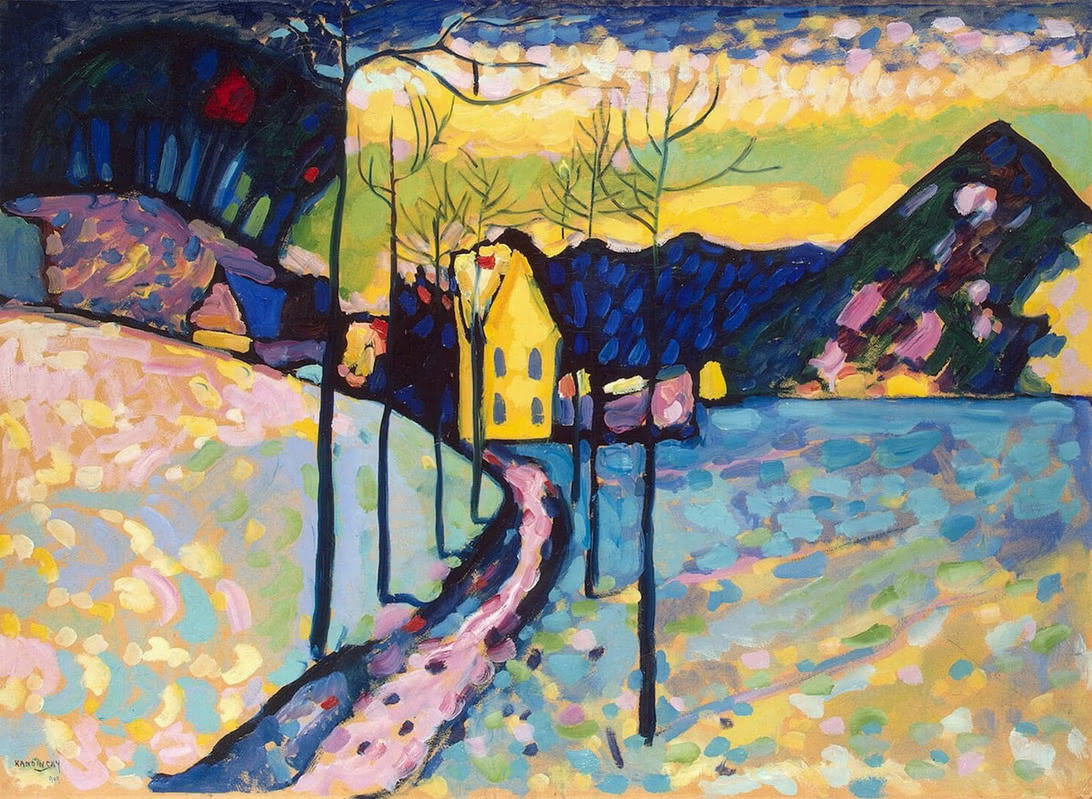
Ready to get started?
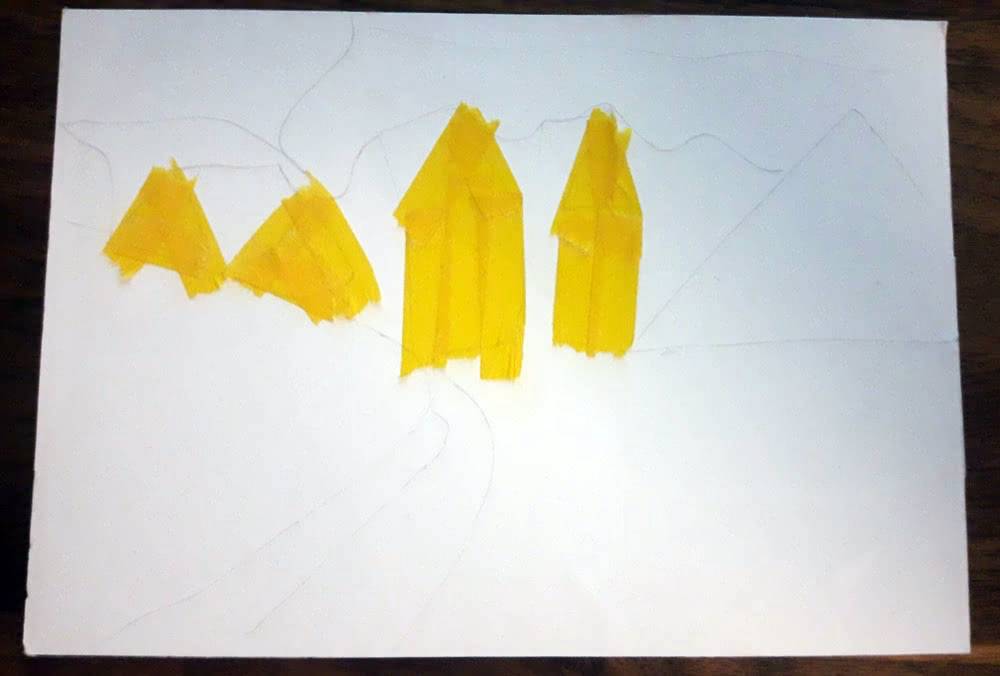
1 step — 2H pencil outlines, the houses are already covered by thin single colour tape.
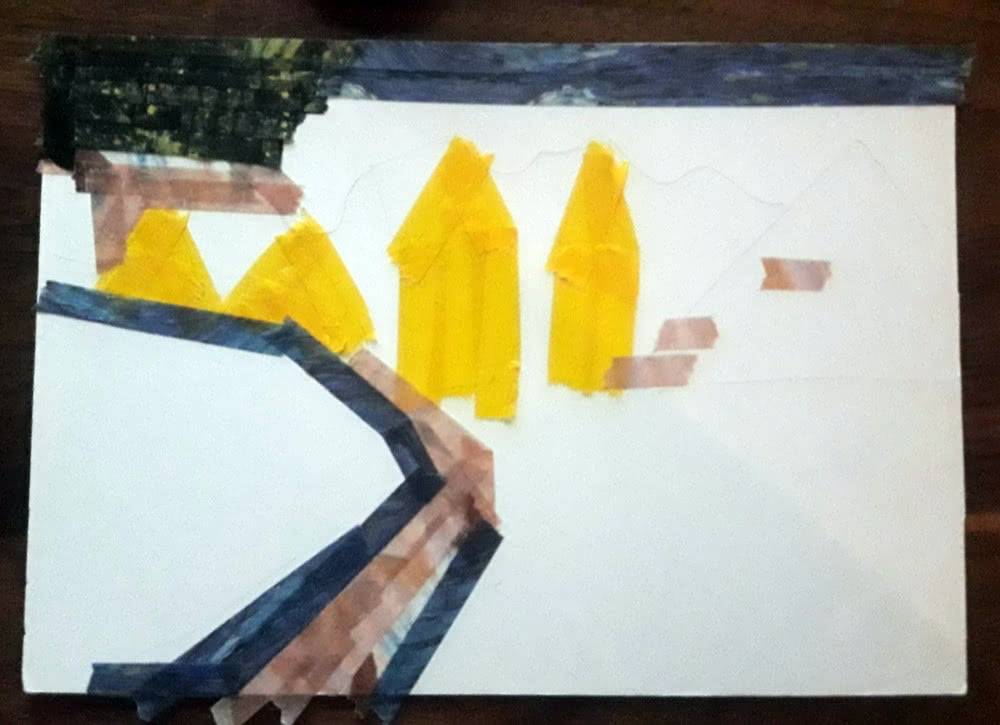
2 step — Beginning of filling — I usually do the small areas first.
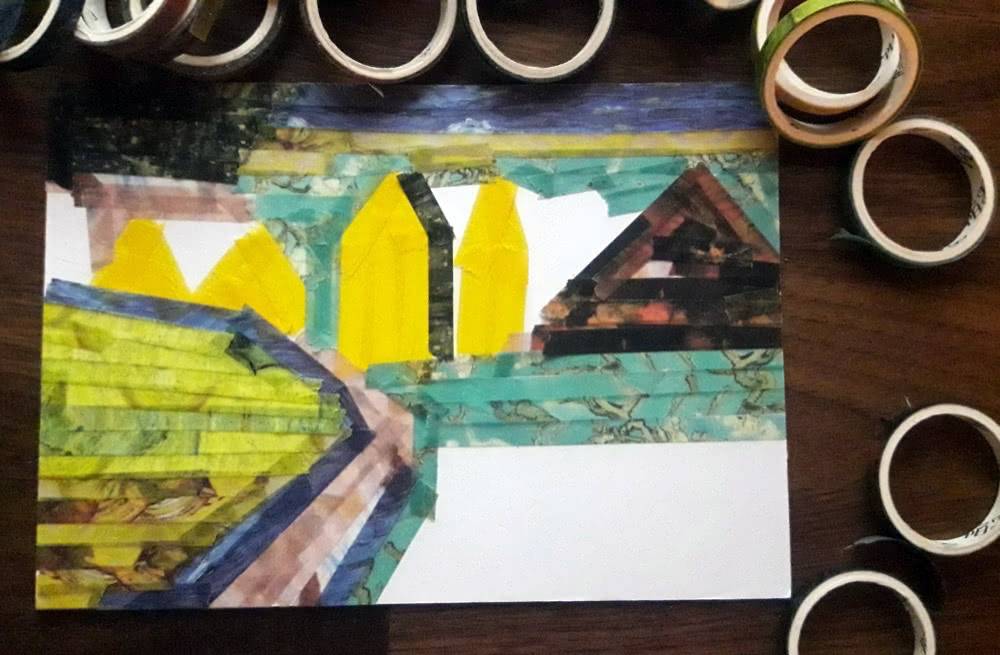
3 step — Filling the big areas — since Van Gogh colours are more summer-spring the winter scene will need some tinkering.
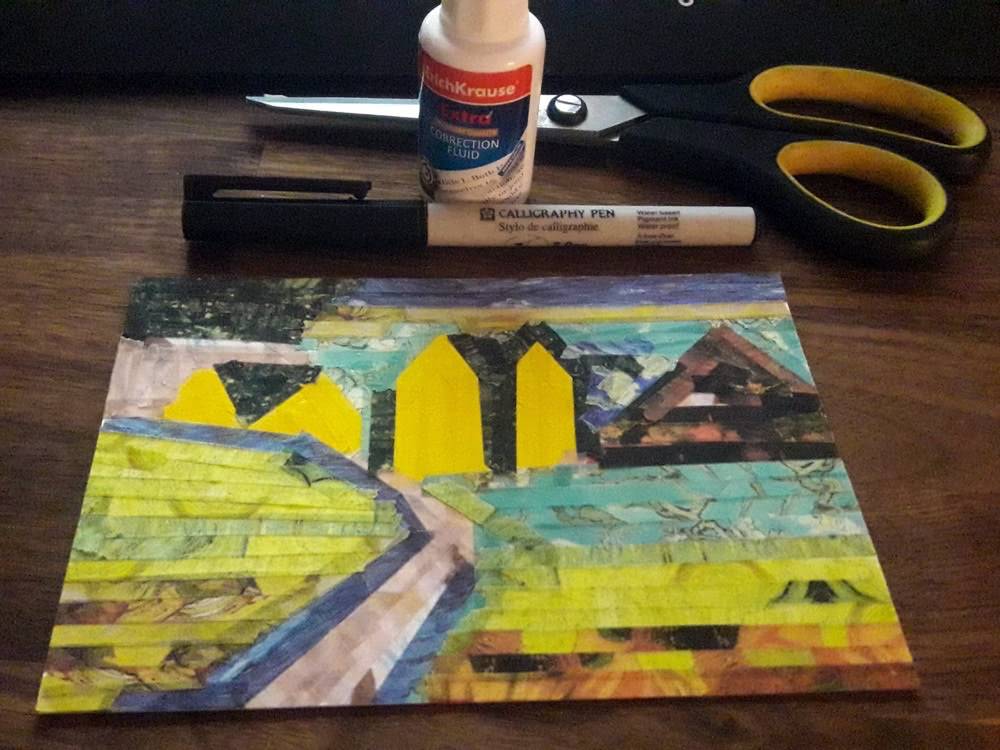
4 step — the “tails” of washi tapes cut, I used correction fluid for snow roofs and Sakura calligraphic pen of 2.0 mm for trees, windows and shadows.
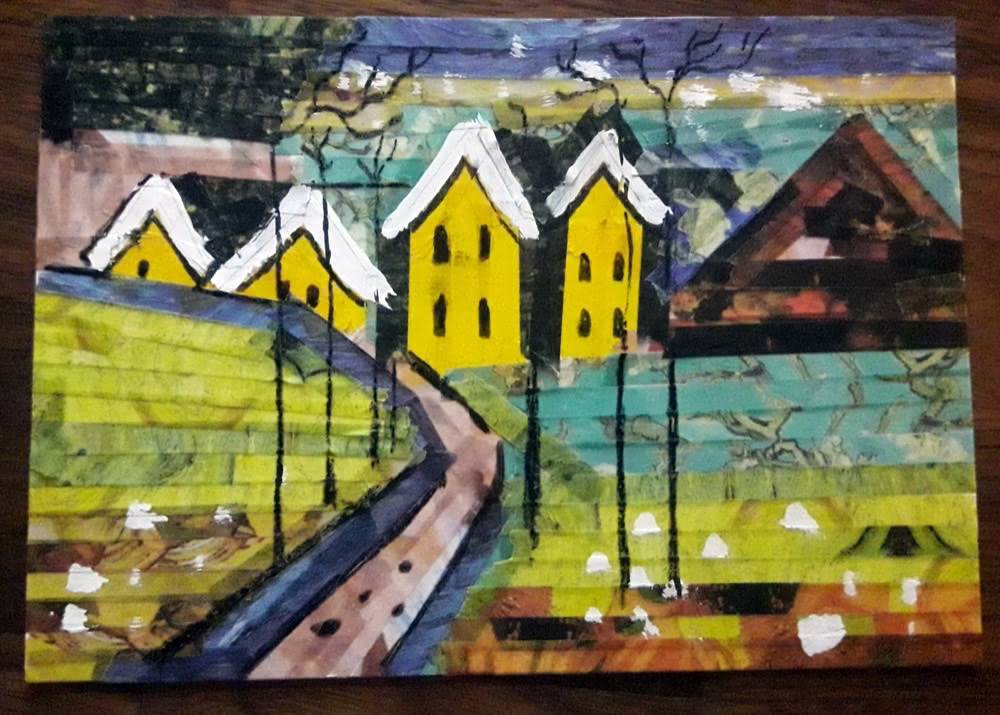
5 step — Ready! Now time for laminator or a zip bag — I cut the window for the stamp on the backside, so it gets cancelled, but the card itself protected by plastic bag.
Isn’t that wonderful? We love how this technique turns tape into texture and into a beautiful picture too! It’s also a nice reminder that handmade postcards don’t need to be perfect or complicated — sometimes a few simple lines, a handful of colours, and a bit of patience are enough to make something special. Also, Ksenia says that these pictures take quite a bit of tape to make… so they’re great for removing the guilt of buying so many washi tapes! 😂
A big thank you to Ksenia for letting us share her tutorial and photos. And if you give this technique a try, we’d love to see what you make on the washi tape discussions topic! 😍
4 comments so far
Wonderful! Thank you!
Wow! This is amazing! I love seeing how creative people are! :)
what an amazing idea! :)
Gorgeous! Thank you for sharing, now people can‘t make me feel bad for having so much washi tape😂